Search This Blog

Wednesday, August 13, 2014

Gray Water Irrigation System

The construction of the gray water irrigation system here at the house is functioning on an experimental basis and is almost completed. We have departed from the standard or recommended design for the distribution of the water into the garden with this system. We did this primarily because we do not want to create the larger pits filled with mulch or gravel for the water that percolate into the ground as is usually done.  We want to use flexible irrigation hoses with holes in the line near each one of the plants with small gravel or mulch basins near each hole in the flexible water hose.  We think this will be more efficient, but the holes may get clogged. We still consider this approach very experimental. I will report on the success of this method once we have it working with a little time under our belt operating it.

The gray water that we are capturing is the water from the laundry and one bathtub/shower and the bathroom sink.  We may add one other shower to this system, but that one is used very infrequently and it may not be worth running a pipe that far (Note: I may add that shower as an alternative to my taking a shower in the bathtub). Also, we do not think that we can effectively use that additional water as it might exceed the capacity of the system. Also, we are not adding the gray water from the master bathroom because it is on the second floor and we would have to open up too many walls to separate the gray water from the black water.
We have decided to bathe downstairs so that we can capture this gray water.  This will be primarily during the summer months when we have the largest need for water in the garden and very little rainwater.
(Note: this comment was added after the system had been installed and was running for a while.  Now that the system is operational, I am running the drain line from the shower to the gray water systems.  This will not increase the load on the system as I will be not taking a shower in the bathtub and, instead, showering in the shower stall.  Total cost for the additional run turned out to be about $15. 00 for the convenience of taking the shower there.)

Capacity

We do about six loads of washing a week, at 15 gallons per load. We have a front loading high efficiency washing machine. Figure about 90 gallons a week for this.  For this system, however, it will be far more meaningful to talk about daily usage, since we do not want to flood the garden with too much gray water at one time.  We normally do no more than two loads in the washing machine a day (2 loads = 30 gallons).
There are two of us in the house and we either take a shower or a bath. Figure about 20 gallons for a shower (my showers are usually only 5 minutes long and should only use about 10 gallons) and about 30 gallons for a bath. I generally take the quick shower, my wife tends to take the bath.  So, figuring that on a typical day we each bathe, that is another 50 gallons of water or less. I have to assume for computing the capacity that this is on the same day as the 30 gallons or water for the washing machine.
In summary, for a typical day when the laundry is done we might use:
Washing machine                  2 loads                   30 gallons
Bath                                        1                            30 gallons
Shower                                   1                            20 gallons

Total                                                                     80 gallons

Now, we know that this is not going to be all used at one time, so we are going to build the system to handle a maximum of about 40 gallons in one hour.

Gray Water Storage Capacity

It is not a good idea to store gray water for more than a day.  We want to merely store that larger quantity of water for, say, at most an hour or so to let it permeate the ground, instead of running off on the surface if it is discharged too rapidly.  We are building the system to handle about 40 gallons an hour, but do not expect to be using 40 gallons in one hour very frequently (at most 3 times a week), and most other times there will be no or very little water going through the system.

The Garden

We have chosen a large succulent and cactus garden that we have constructed that we currently hand water.  The Garden is about 320 sq. ft. in size.  It is located downhill from the house and about 60 feet away from the house.


The Storage Tank

We have departed from the typical storage tank concept and decided to use the drainage pipe itself as the storage device.  There are approximately 55 feet of 4 inch diameter drainage pipe once the water leaves the house.  There is also about 20 feet of 2 inch pipe running along the foundation leading down to the 4 inch pipe.  The storage capacity in the pipe is as follows:

55 ft. of 4 inch pipe  = 4.80 cu. ft.
20 ft. of 2 inch pipe  =   .44 cu. ft.
Total capacity              5.24 cu. ft. = 39.20 gallons

Water Distribution to the Plants

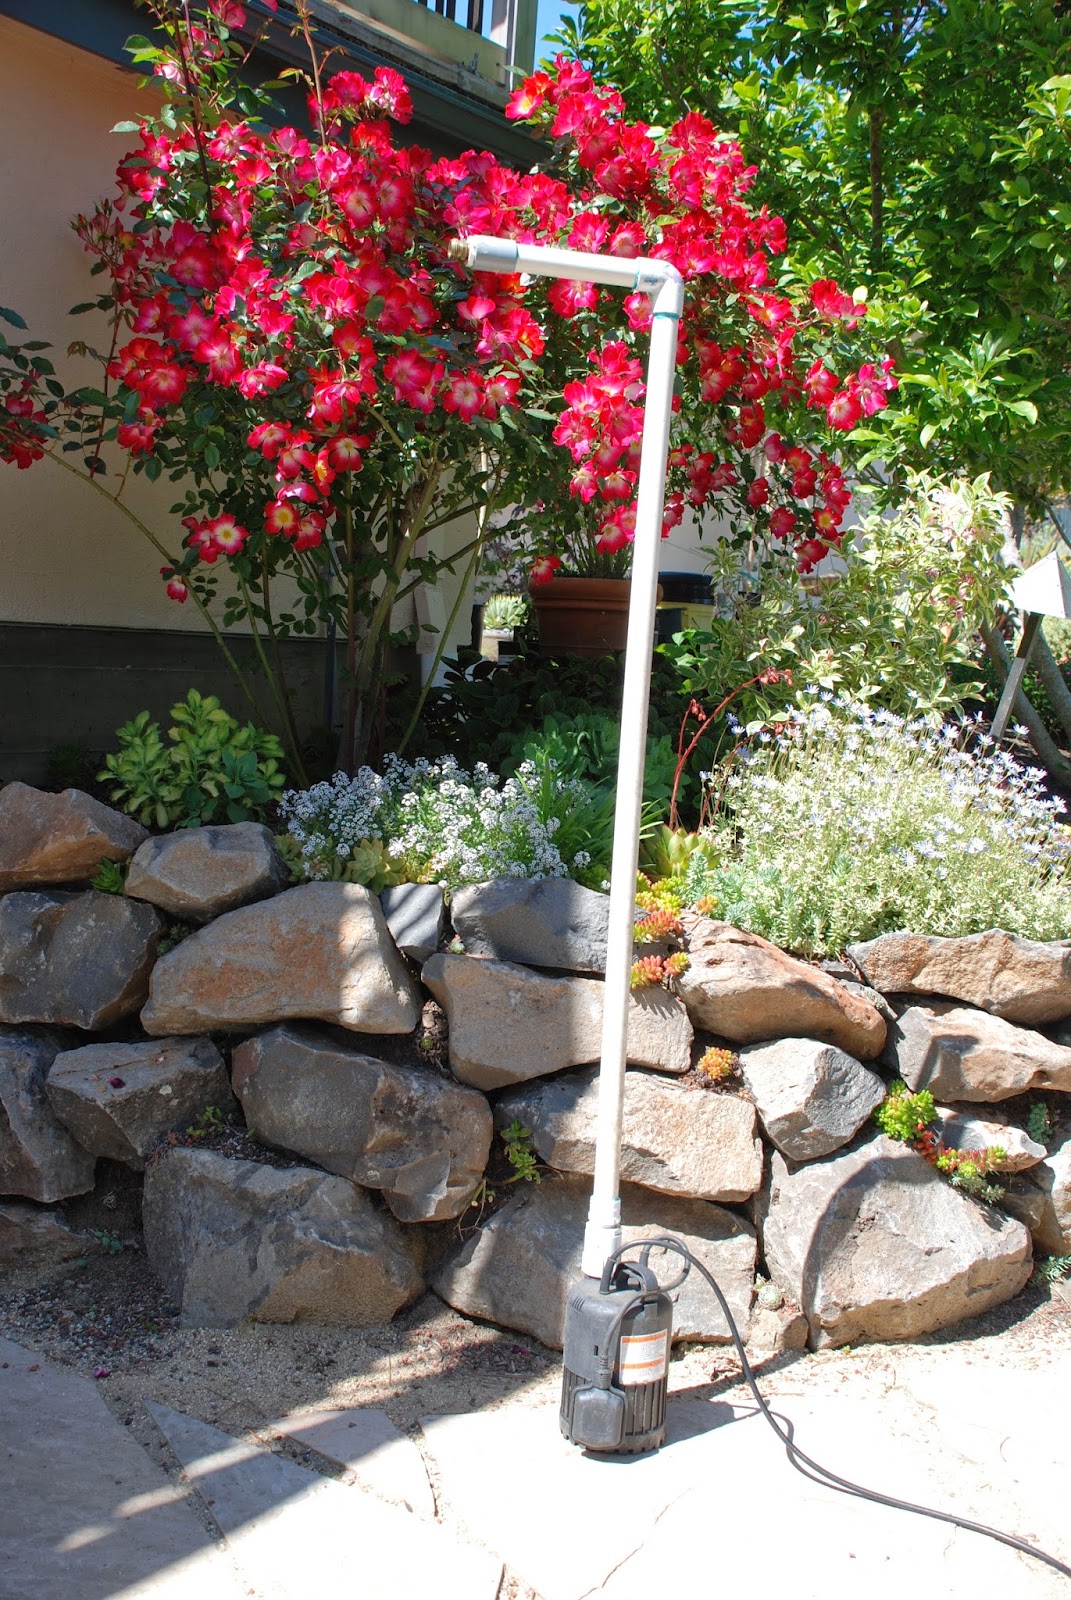
At the base of the pipe just as it approaches the garden from the house we have installed a large irrigation box. You can see the green cover plate for that box in the picture above. Immediately before entering the irrigation box the pipe changes back from a 4 inch pipe to a 2 inch pipe. In the box we have an inspection window in the pipe made from clear plastic tubing the same diameter as the pipe.   Then, following the window there is a manifold.  The header is made of 2 inch plastic pipe. We have drilled  5  holes, each  3/4 inches in diameter into the manifold and inserted nipples and connected the black flexible 1/2 inch irrigation tubing to the nipples.  The flexible tubing weaves between the plants underground (Note: since I am still experimenting the tubing is above ground as you can see in the picture above). Also note that there are a number of bends in the pipe within the irrigation box so that I could fit it all in there.  Obviously, if you have a different setup you may be able to do this without all the elbows I had to install.


The flexible tubing has holes near each of the plants to be watered.

The amount of water that will be distributed to the plants on a square foot basis is computed as follows:
If you assume that he water is distributed evenly over the 320 sq. ft. area of the garden, then, on laundry day (80 gallons of water)  the amount of water per sq. ft. will be equal approximately 10.5 cu. ft./320sq. ft. = .033 cu. ft../sq. ft. To compute the equivalent rainfall this must be converted to inches. This is 57 cu. in./sq. ft., which translates into the equivalent of .4 in. of rainfall. Since this distribution method will not distribute the water evenly, we are estimating that the equivalent for the areas that are actually receiving the water will be more like the equivalent of 1/2 in. of rainfall.  Ideally this level will be achieved at least three times a week, with smaller amounts on days when only the bathing occurs.

Percolation of the Water into the Garden

There are two inspection windows made of clear plastic 2 inch pipe. One window is attached to the manifold down by the garden (see above picture) inside the irrigation box that we just discussed above, and the other is just at the point where the pipe leaves the building (see picture below).


This is exactly the area between which there are about 40 gallons of storage capacity.  With the bathtub full of 40 gallons of water I can now test to see how long it takes for the storage pipe to empty (I considered installing a valve in the irrigation box that would allow me to store all the water above the valve, but opted not to do it for fear that I might forget to open the valve when required and thereby cause a backup into my house.)
(Note: Now that the system is in I think it might have been better to put in a bib valve so that I might take water from the garden hose to connect to the system so that I might use the irrigation portion of the system without having to do laundry or take a shower.  The only alternative I have without changing the system is to put water into the bathtub and let it flush through the system.)

Gaging from the time it takes to percolate into the ground with a limited number of holes I have now computed that it takes about 10 holes to percolate 40 at gallons per hour. I have installed about 40 holes, so it takes about 15 minutes to distribute 40 gallons of water.

The flexible irrigation pipe is exposed for testing purposes.  When testing is completed the hose will be buried and mulch or gravel will be inserted around all the outlet holes near the plants.

Cost

The cost of the project has been about $200 in materials.  It took a few days to install.

Other Considerations

I have not yet installed either a bypass valve or an overflow for the system.  These matters concern me and I will be addressing them.  The main problem with the bypass valve is that I must install one that is electrically controlled as the place where the valve must be located is in the crawl space below the house. More on this later.

last modified 8/17/2014


Sunday, June 22, 2014

Cosmetics

As I have noted earlier, I have moved the filters so that they are located behind a stone wall.  I have created a cavity with a material called Ditra that allows me to remove the upper pail for cleaning out the lower pail filter when necessary from time to time (I have not needed to clean it out yet, I will report on the frequency once I have some data on this.)

The sequence of pictures below are images of the filter behind the stone wall.  The first is from a distance to show the camouflaged position.  The others show progressively closer to see the details.


To see what the filters look like before I put them behind the wall please to to my post on the construction of the filters.

I have indicated elsewhere that I have excavated part of a hillside where I now have a level area to put the IBC Totes.  This was done, primarily, to level the ground where the tanks are stored, but also to provide some level of cosmetic camouflage for the tanks.  I have at this point constructed a perimeter wall on the uphill side of the tanks of hardy board and steel columns.  I have backfilled the hill above the tank.  This picture shows the tanks enclosed with the backfill above them.  The white pipe is the overflow for when the totes are full to divert the water to the field below.


For the top of the tanks, since I have to protect them from light I am constructing a platform from pressure treated decking.  I have decided to divide the platform into two parts so that if I need to service the tanks below it I can lift off the appropriate section. I am stapling a black landscaping fabric to the underside of the decking to keep light away from the tanks.  I am also hinging the two sections of the deck together so that I can lift one section on top of the other should I need to service anything underneath.

I am also going to plant some bushes around the tanks to further camouflage the storage area.

last modified 8/15/2014

Friday, April 4, 2014

Backflow Prevention and Pressure Reduction

I have now spent some time looking at the situation I have and what I need to install: a backflow preventer and a pressure reducer.

The backflow preventer is required, because I am going to have my rainwater storage connected to the irrigation system, the irrigation system, in turn, is connected to my potable water system that is supplied by the municipal water district.  I do not want non potable water (rainwater, in this case) to infiltrate either my potable water supply (domestic water for the house), or the municipal water supply system.

If I do not install such a device, and if the pressure reduces on the municipal system, for some reason beyond my control, and the water pressure is higher on the rainwater storage system side, then water could flow in the wrong direction and contaminate the public water supply and my domestic water supply.

The pressure reducer is needed to reduce the water pressure in the irrigation system from the nominal 50 psi pressure of the water coming from the municipal system to 30 psi for the irrigation system.  There are a number of reasons to reduce the pressure.

The sprayers in my irrigation system were designed to optimally function at 30 psi.  The spray heads will last longer, will distribute water in a more even pattern over their range, and it will most importantly, reduce misting which could waste as much at 40% of the water being used by having it carried off into the air.

Needless to say, the reduction in pressure will most likely reduce my water consumption (and water bill) by at least 25%.  I may have to compensate for the lower pressure by leaving the spray head active during a given cycle by extending the time it is on.

There are many kinds of devices to accomplish these functions on the market, most are relatively expensive for their size, but cheap when it comes to their ROI.  I will try to include here what I am finding and why I am choosing the specific devices.

There seem to be very specific instructions on where and how to install these devices.  For example they must be located substantially above the ground (unless you go for a much more expensive device) and also be higher than the sprinkler heads.


Thursday, April 3, 2014

Installing a Valve to Divert the Rainwater to the Storage Tanks

On my house here there was a 4 inch drain pipe coming off each downspout that all collected (underground) into one pipe that was diverted out to the street.  It was while I was putting on the deck to my house that I redid the piping for the downspouts. At one point just before the drainage for about half the house connected to the main line going out to the street, I installed a valve.  The valve (all PVC) allows me to either have the rainwater go straight to the street, or, if I choose, go to my storage tanks.  I purchased it here in town at one of the supply houses.  It is a very simple device that is buried in the ground with a shaft that comes up to the ground level. When I want to divert the water to my tanks I merely turn the handle inside the shaft and I am done.  The top of the shaft is level with the ground and is located in one of my flower beds.  I have installed a plastic grate on top of the shaft (6") to protect the shaft from getting debris down in there.  I really like the valve -- Cheap and effective.

Monday, March 31, 2014

Rainwater Harvesting Regulation

Now that I am harvesting rainwater, there is an app for that. Just kidding. Actually, there is a regulation for that.

As part of the CPC 2013 (California Plumbing Code). There are regulations and limits on rainwater catchment systems effective 1/1/2014.

First, the rainwater system must be isolated from the potable water supply, by either air, or a backflow prevention device.  I intend to put a backflow prevention device in when I connect the storage tanks to the underground irrigation system, since the irrigation system is connected to the potable water supply.

Next, there seem to be restrictions on the ability to use the rainwater in a spray irrigation system. The concern here is to prevent pathogens from being released into the air where they might infect someone.  There seems to be a workaround if the filtration level is sufficient. Apparently 100 micron filtration will do it.  I am going to that level of filtration anyway to insure that I do not clog the spray heads of the irrigation system.

There is also a restriction on the maximum amount of storage in a tank. Apparently 5000 gallons is the maximum storage per tank without a building permit.  Since I intend to pump the rainwater harvested back through my irrigation system and I intend to have more than 5000 gallons of storage, but not more than that in any one tank.  For a citation on CPC 2013 requirements  see this website.

After talking with the county building department I was informed that I must secure a plumbing permit at a nominal cost before I do the job. They have asked that I submit a plan to them for the project.  I suppose I will print out many of the illustrations I have already made for this blog as part of the plan. Apparently I am the first person to even ask about this stuff. No one has sought a permit for this use previously.

April 3. Today, I had a building inspector here for the final inspection of my deck. I passed with flying colors. (After all, it was the installation of the deck that started me on this path.  I rerouted the downspouts to the valve so that water could be diverted to the storage tanks.) He informed me that I should NOT file for a plumbing permit and that I should just put it in and not worry about it. Now I have an answer that I like. He confirmed that the restriction on 5000 gallons for a permit is per tank, not per system.


last modified 4/5/14


Friday, March 28, 2014

Secondary Storage of Rainwater

I have designed, but not yet implemented the secondary storage array of IBC totes for the rainwater catchment system. See illustration below


This array or "wall" is for 15 IBC totes.  Each tote has a 275 gallon capacity, so this array has a capacity of 4125 gallons.  The wall is about 20 ft. long by 12 ft. high and 4 ft. deep.  I will connect all tanks at the same level together  with a valve to not permit the water to go down to the next lower level in order to keep the water as high as possible in the array for keeping the water pressure high at ground level.

It is my hope to construct two of these walls about 12 ft. apart, running parallel with each other giving me a total capacity of 8,250 gallons for the secondary storage.  That way I can construct a roof over both and basically have a breezeway between the two for storage (I can even fit my car in that space).  I am going to have to put some sort of cover over the wall to protect the tanks from the UV light.

I will have to modify this design if I use it to allow for air to vent out of the individual tanks as the water rises, just as I have done on the primary tanks. More on this later.

I have also learned of very inexpensive water bladders that will hold 10,000 to 40,0000 gallons of water that might be considerably less expensive, not require protection from the UV light since they are opaque black, and will pressurize as they fill to give me more water pressure without having to pump the water.  More on this later.

last revised 6/17/2014

Pumping Water

I have to pump water in a variety of ways. First, I have to pump from the primary storage tanks to the secondary tanks.  Additionally, in order to get the required pressure into the irrigation system I have to further boost the pressure of the water coming out of the secondary tanks going into the irrigation system to 30 PSI.  In order to accomplish this I have installed pumps into the IBC tote and plumbed the line to the irrigation system.  I have illustrated below the way I am arranging the pump.


Sump Pump before installation into the IBC Tote

I have now installed and plumbed in the sump pump to remove water under pressure from the tanks. I have two ball valves in the line so that I can have the irrigation water line feed shut off and use the pump with the faucets in that section of the yard, or I can open the valve to the irrigation line and pump water into my irrigation system. Alternatively, I can run water directly from my irrigation system to my faucets by closing the valve to the tank.  See illustration below.


last modified 6/20/2014